Friday, May 1, 2015

Craft Log 5/1/15 Quilting

So I've begun quilting. I love making clothes and now I'm making quilts. I took a class at the end of February on beginners quilting, and now I'm halfway through my first lap quilt. My thinking has to switch now between garment mode and quilt mode. Especially when it comes to cutting and seam allowance. I've definitely gotten better at using my rotary cutter. All of these blocks were made in classes that I took.

This is the first quilt block I made, it's called an "Ohio Star"  I made it in my Quilting 101 class. I used 3 fabric quarters. A star print, a beige solid, and a lavender floral print.

This one is called an "Amish Cross" it was the April Quilt Block of the Month at my local Jo Anns. I made it with 3 fabrics, a Star Wars print, a Star print, and a royal blue solid.

This was May's Quilt Block of the Month at my local Jo Ann's. I forget what its official title is, I think it's row of daisies. Anyway it is made with 5 fabrics: oil slick purple, oil slick blue, green tonal, blue tonal, and a purple solid.


And finally this is my first quilt top, the design is called Pennant Love it's 12 hour class. The triangles or pennants are made from a red floral print. The background is made from Michi Kanji Black by Alexander Henry. The borders and what will be my binding is made from a red scallop print. Finally not pictured but my backing will be made from  Tatsu Black and Red. I made the top and now I have to add the batting and backing, quilt it, and then add the binding.

So this has been my new adventures in quilting.
Happy Crafting


Friday, April 24, 2015

Crafting on a low Budget Pt 3 Materials


Your materials, your yarn, your beads, your fabric, thread, you know all the things that you need for your individual projects. Materials are one of those ongoing purchases when it comes to crafting. For every project, you have to find the right the color material, the right weight (for fabric or yarn), and the right shape and size (beads).
 
 
You can try to buy used but finding enough yarn or fabric for the project you need can be difficult. Not to mention finding the right color, shape, size, weight, etc. This is one category where I would not fault you if you only bought new.

Buying all new materials can get expensive, especially if you have to do trial runs an such. Save as much as you can from project to project. You’d be surprised how little fabric you need to make an applique or even to quilt. Then you only buy what you absolutely need for each project. I find that a spool of thread can last two or three projects especially neutral colors like white, black, and tan.

You can, also, be very diligent about checking clearance sections, just be aware that clearance sections are items that the store will not carry anymore so grab as much as you are going to need because getting more may be difficult.

When buying new plan your project well ahead of time so that you can scope sales and coupons. Nothing like having to pay full price for a last minute costume (i see that one a lot). Planning ahead also gives you a chance to do any practicing and trial runs on cheaper or leftover materials so you don't mess up your more expensive materials, and then have to pay full price last minute for new material to start over.

Materials will always be a recurring cost but planning ahead and buying on sale will make it less daunting.

Happy Crafting

Friday, April 17, 2015

Crafting on a low Budget Pt 2 Patterns, Instruction Books, and Classes

When you start doing a craft many times you rely on taking classes and reading instruction books to learn how to actually go about making crafts. It’s difficult to save money on these items because you can’t really buy a “used” class. As always there are things you can do to make it cheaper on yourself.

CLASSES

Classes are a wonderful way of learning a craft but you have to think about whether or not they are necessary. Classes can be $10 to $100 even more for a private instructor and with google and wide array of blogs and Youtube channels you can learn many techniques without even stepping foot in a classroom. Now I’m not completely against classes, nothing compares to having an actual instructor, in front of you, walking you through a process or technique. My tip when it comes to saving money on classes is to learn what you can on your own and then see what you might need help with before you take a class. You may find you skipped the beginner class and need a more advanced technique class. Also, when taking classes at a chain store, wait until you can get the classes on sale, sometimes up to 50% off and, look for short classes, Jo Anns offers 1 hour classes for $10 that focus on one specific technique. This is reminiscent of the “Buy what you need when you need it”. If a class teaches stuff you’re pretty proficient in I wouldn’t buy the class.

INSTRUCTION BOOKS/PATTERN BOOKS

Books are the way we learn how to make the specific items  in our craft. My advice when it comes to these items is to look online first. With pinterest, google, and youtube, it’s amazing what can be found. Also I find it easier to find a specific project when I’m able to type it in a search bar. If you really want a book scour ebay and amazon for used books before buying a new one. Of course if you have to use a coupon or buy it on sale and you can save money.

SEWING PATTERNS

This has more to do with sewing, if you don’t sew you can skip this part.
Ah patterns, those lovely little envelopes that cost anywhere from $3 to $35. I bring these up because I know all too well about trying to save money on these. Sewing patterns are difficult to buy used because of how they are used, if you buy one used you may not be able to use it yourself which is what makes buying patterns cheap fairly difficult. Most chain craft stores will have sales of patterns every once in a while. I don’t buy them from chain stores unless they are less than $3 a piece. One of my suggestions, when it comes to sewing patterns, is to buy as many as you intend to make when they are on sale. Even if you don’t have the skills yet to make them, go ahead and get them any way, because you never know when they will go out of print. When they go OOP the only way to get them is online and the websites don’t tend to have sales and the shipping cost can be pricey. Be mindful of limits the store puts on patterns, they usually don’t allow more than 10 per transaction, this is to prevent resellers, even though smart resellers will find a way around this but that’s a rant for another time.

So in closing when it comes to learning material see what you can find for free online first, then try and buy what you need used, and finally try to buy it on sale or with a coupon.

Happy Crafting

Read Part 1 Here 

Saturday, April 11, 2015

Crafting on a Low Budget Pt 1 Tools


Let's get one thing straight, crafting can be expensive. Whether it's knitting, crocheting, sewing, jewelry making , scrapbooking, or whatever you like to do it can get pretty pricey. I'm not going to lie, as someone who works at a craft store the amount of sticker shock I see is phenomenal.

I don't want to turn anyone away, crafting is a very fun and fulfilling hobby. Where else can you find items that are just you, they fit you perfectly, fit your lifestyle, and your personality but sometimes we run into the one major problem how to afford it when you don't have much money. Here are some tips to help bring those costs down.

  1. Buy only what you need when you need
  2. Buy used when you can
  3. Buy when on sale or use a coupon

These are my biggest tips, every other tip will probably lead back to these three tips let me talk a little bit about how they pertain to the tools part of crafting.

Tools

Tools, they are the most important part of crafting. They are what you use to craft, your sewing machine, your needle nose pliers and wire cutters, your crochet hooks, your knitting needs, your hammer and nails, etc. Without the tools you may not be able to craft.
I, especially, bring  up tools for beginners because when you first start a craft you may not have the tools needed. When you walk into a craft store and look in the tools section of the jewelry department you may get a little overwhelmed by the amount of tools available, from crimping tools, flat nose pliers, round nose pliers, wire  cutters and flush cutters, and that’s just the beginning of available tools. Same thing goes for knitting, different types of needles, sizes, brands, and specialty needles. Have you ever been down the sewing notions isle at any craft store? It can be overwhelming.
Now we come to the first tip, buy only what you need when you need it. When you first get started you most likely aren’t going to need every single knitting needle or crochet hook available, or every single jewelry tool that’s on the wall. In fact you probably don’t even need half.

Just to get started you need:
  • Knitting - A set of needles and some yarn.
  • Loom Knitting - A loom and some yarn.
  • Crochet - A hook and some yarn.
  • Sewing - A needle, thread, and fabric.
  • Scrapbooking - Paper, Scissors, and Glue.
  • Jewelry Beadworking - bead string and beads.
  • Jewelry Wire working - wire cutters, flat nose pliers, round nose pliers, and wire.

That’s all, I know this list is very minimalistic but it is a start. Before you get started on actually making projects you have to learn the basics. To learn the basics you really don’t need a lot of stuff. Then after you learn the basic you start on simple projects, this is “the when you need it” happens, if you buy the extra tools as you find you need them for specific projects. You may find 20 projects down the road and you still haven’t found a need for some of the “beginner” tools that are advertised.

Now if you do find that you need every tool available, this step doesn’t really save you money more than it spaces out the cost so you don’t have such a large investment up front.

Which brings up my second tip, buy used when you can. Shop yard sales, search craigslist, scour ebay, and even facebook for used tools. Especially for some high dollar items like a sewing machine, desk, or many organization tools. Personal story: I managed to get a huge set of different knitting needles for $2 because a lady’s mother had passed away and no one else in the family knitted. Same thing happened to me with some sewing supplies, I got three huge boxes full of thread, notions, and other tools, that I didn’t have at the time, for $1.
If you have friends that craft see if you can borrow their tools to learn off of to see if you like the craft before you make the investment. Don’t be afraid to look around and ask around you may be surprised what you find.

Now buying used is not always possible, and some items are better bought new which is where shopping sales and coupons comes into play.
When buying new tools always shop around, sometimes you may be able to get something cheaper at a different store. Now cheaper doesn’t always mean better quality but if you have to, cheap will get you where you need to go.
Now I am not a fan of buying craft supplies from Wal-mart, they are cheaper than cheap and it shows, but I also have other options in my area. If you have a Hobby Lobby, Michaels, Jo Anns, Ac Moore, or Hancocks in your area go ahead and join their coupon program. Jo anns is closest to me so I do most of my craft shopping there, I know Jo Anns will send you coupons by Mail, E-mail, and text, you can also download their app that will send coupons straight to your phone, and their website always has coupons. Other stores have their own coupon program so don’t be afraid to use them. I bought all my jewelry tools from Jo Anns, I made sure to buy them on sale, they were actually cheaper on sale at Jo Anns than at wal-mart and better quality.
You may live in an area where you don’t have many specific craft stores, my simple answer, shop online. Amazon, Ebay, and all websites of the aforementioned stores will deliver straight to your house. Shipping may be expensive but most websites have a free shipping price threshold, like $35 for amazon, Jo anns has a $50 threshold for free shipping, $60 for Hancock. Don’t forget the online only deals that all these websites have, and the fact that any coupon you can use in store can also be used online, unless the coupon actually says “in store only”. Don’t be afraid to look to the Web.

Crafting is not cheap but there are ways to make it less expensive.

Happy Crafting

Read Part 2 Here 

Tuesday, March 31, 2015

How to Trace a Pattern

If you like to sew then you are familiar with patterns, especially if you like garment sewing. Even if you don't use patterns you know what they are and how useful they can be. Whether you use them to make the garments exactly as they are on the envelope or if you just use them as a starting point for a project, or even just for inspirations, patterns are useful.
As much as I love patterns they tend to be a one use item, I know you can use them more than once but after you cut them there are limitations. To free yourself from those limitations I give you pattern tracing.

Materials


1. The pattern you want to trace is the first thing on the list because without it you can't really do anything. I've chosen a simple one project pattern that I got for about $2 at wal-mart. It may be a cheap pattern but imagine it being a $20 vogue pattern.

2. Tracing cloth, it is a sturdy see through material that you can use not only to trace patterns but to make patterns also. The one I use is Pellon 830 Easy Pattern Tracing Cloth. (This one is blank they also have one with a 1 inch grid and one with red dots at 1 inch intervals. If you do not have access to tracing cloth or pattern paper you could also use parchment paper or freezer paper.

3. A pen, or pencil, you need something to mark on the tracing cloth with.

4. Optional A piece of paper to keep track of the pieces that you have traced and which ones you still need to trace.

5. Optional A ruler, a yardstick, and a french curve(not pictured). These help you draw a straight line, they are very helpful when tracing patterns, and make tracing a lot easier, but are not exactly necessary, as long as you stick as close to the lines as possible the pattern will still be usable.

6. Optional A well lit location. Although not necessary adequate lighting will save you from a headache and backache. Nothing like trying to find black lines in the dark.

Now that you've gathered all your materials and found the best location it's time to get started.

STEP 1: Before you even get started you need to figure out what size you need. The back of the pattern envelope will have a measurements chart to help you figure out what size you will need.

STEP 2: Open your pattern envelope pull out the instructions and look at the first page to figure out which pattern pieces you need to trace out.


Now since this is a single project pattern I will actually need all the pattern pieces, I would go ahead and write all the pattern piece numbers down. I usually only write the numbers but if you feel more comfortable you can write the name down, also. If I were working with a pattern that had multiple views and I only wanted to make one view I would just write down the pattern pieces for that view.

STEP 3: Open the tissue paper and find the pieces you need.
You only have to find the pieces that you want to trace and the sizes that you need. If you have a pattern that has one set of sizes on one sheet and another set on the other you just have to use the sheet with the size you need.
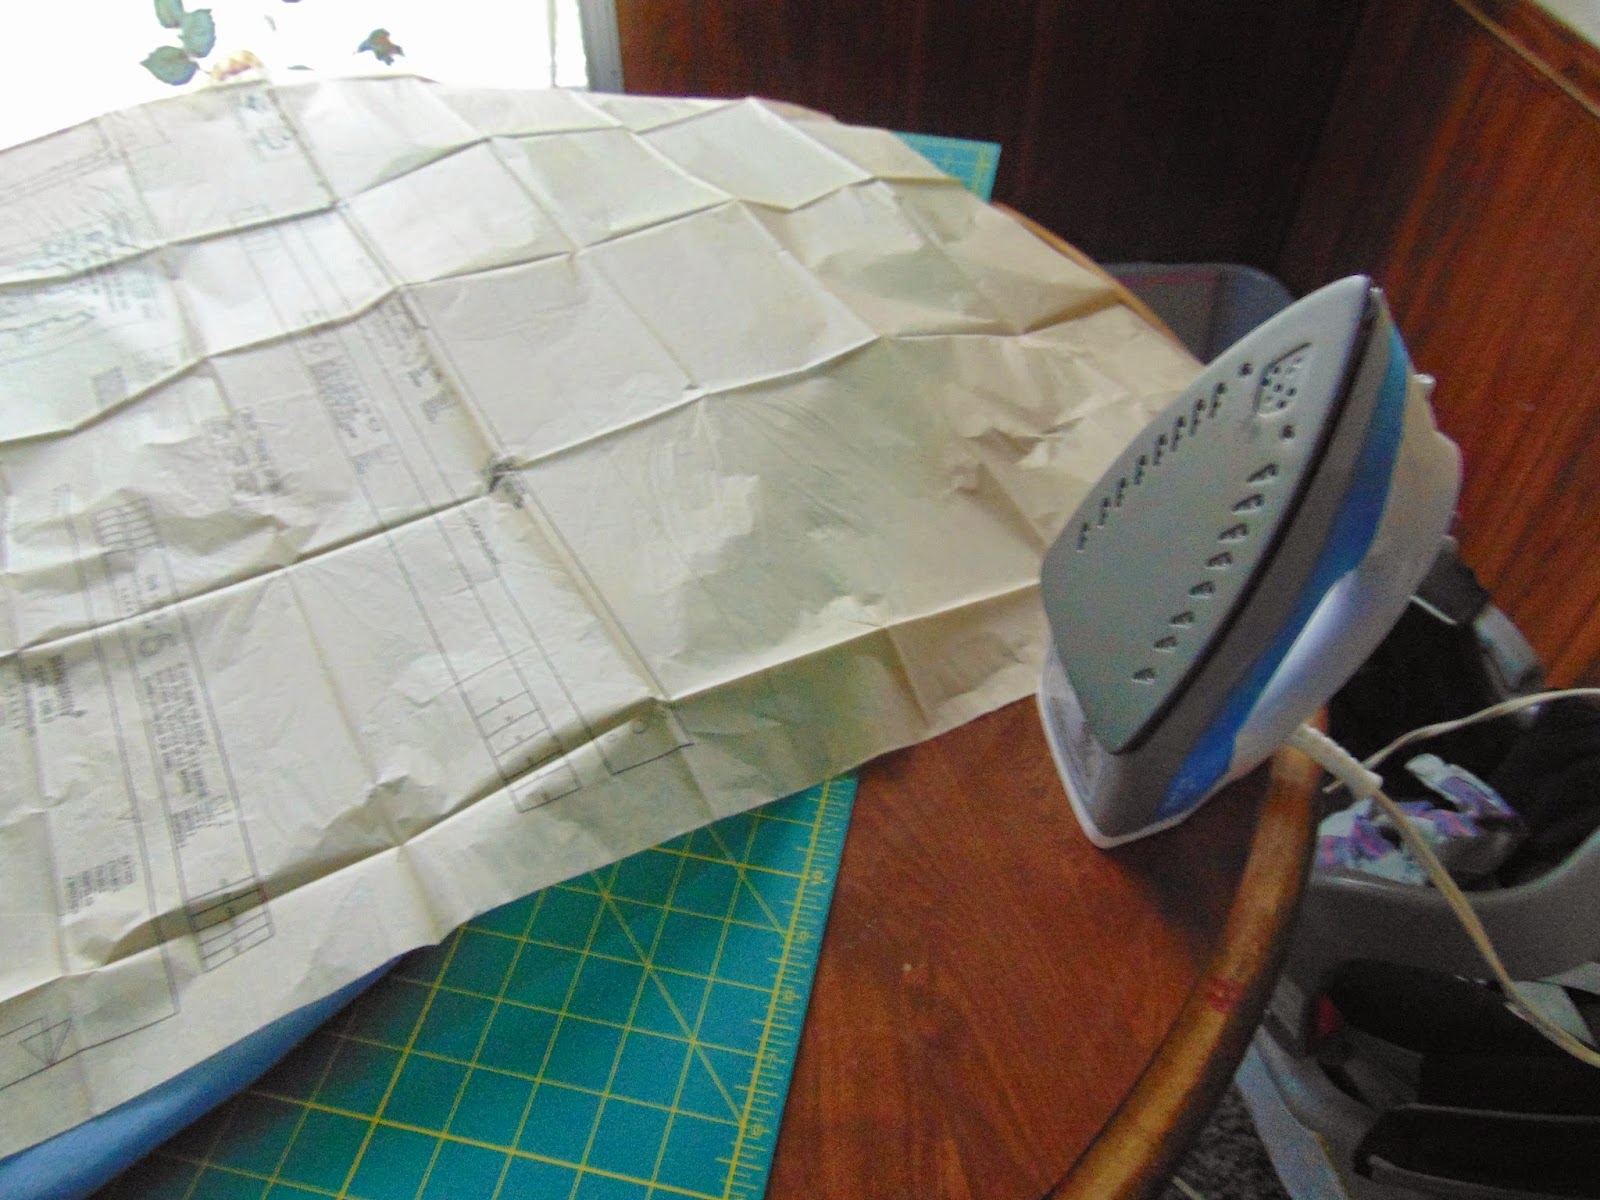
note: It is a good idea to iron your pattern pieces  before you trace them to ensure you are tracing the piece in its entirety. I don't actually iron the entire sheet at once, instead I iron the area each piece is in as I get to it. That way I don't waste time ironing a piece I don't need.

STEP 4: Place a piece of tracing cloth over the area where the pattern piece is.
After tracing a few patterns you may realize how little tracing cloth you actually need to trace a pattern even though it doesn't take much tracing cloth you still need to make sure that you have enough to cover the entire pattern piece in the size you need. If you have to you can tape multiple pieces of pattern paper together to save as much as you can.

note: You may want to use weights keep your tracing cloth and pattern paper from sliding around. You can use pattern weights, soup cans, or jars of baby food like I did.

STEP 5: Begin tracing.


This is the point that you take your pen to paper, or tracing cloth as the case may be. Simply follow the solid lines. You don't have to trace every single solid line just the size you need at this time. If you plan on using a ruler simply line it up to the straight edges and place you pen against it and follow the line. If you are using a french curve just place it against the curve and do the same thing follow with your pen.


After trace all the solid lines you have a pattern piece outline, which is good but you're only halfway there.

STEP 6: Fill in the information.


Now is the time to fill in all the information. You want to make sure to trace the grain line, and any other pattern markings, like dots, notches, center front and back markings, waistline, hip line, darts. Don't forget to include the information like the pattern brand, number, pattern piece number, pattern piece name, what to cut, basically everything that is on the original pattern piece should be written on the traced piece. The only thing you don't have to include is anything written in another language. Also you may want to include the size you traced somewhere on the pattern piece.

Now you have successfully traced a pattern piece, now repeat for all the other pieces you need.

Tip: If you do not have a french curve or any type of curved ruler you can get by with just a straight ruler, to do an armscye simply trace the straight line with the ruler as far as it can go.


And then simply follow as close as you can around the curve. Like this


It may be sketchy and not as smooth as it would be if I had a french curve but it is still a usable pattern piece.

Now if you come across a curved line that has no straightness to it you can sketch in the entire curve like this.


TIP: There may be pieces that don't actually have to be traced, on this pattern there are two elastic guides, one for the sleeves and one for the collar. Since these are just guides to show me how much elastic I need I don't actually have to trace these pattern pieces I can just measure how much I'm going to need for each piece and write the measurement down on my piece of paper next to the pattern piece number.


After you finish tracing all your pieces simply cut them out and use as you would your regular pattern.


Now you may be asking why should I trace patterns? Why take the time? Why not just buy multiple of the same pattern when they are on sale?
There are several reasons and I'll give you a few.

- If you want to make multiple views of the pattern and  view A and B use the same pattern pieces but at different lengths you can trace one or both views of the pattern without having to sacrifice the original pattern piece.

-I like to save money and I have children that I sew clothes for, if I bought a new pattern for every time I wanted to use it I would not only have to buy a pattern for each view I wanted to make but also every size. Multiply however many views I want to make (some patterns have up to 5 views) by all the sizes,(some patterns can go from size 1/2 to 14) that's a lot of patterns to buy even when they're on sale. So I can just trace the pattern pieces for the size and view I want at the time and still have the original with all the views and sizes available.

-What if I wasn't sure what size I needed or if I needed to make a muslin before I committed to a size, I don't really want to waste a pattern just to test what size would work best on me.

-What if I needed to do the infamous full bust adjustment or small bust adjustment, if I've never done one before I would not want to waste a pattern that I paid for on a practice run. This goes for any type of fit adjustments that I may need to do.

-What if I wanted to alter the pattern a bit, or create a frankenpattern, what if my alterations don't work out, I still want to have the original pattern or patterns just in case I need to start over.

-What if it's an out of print pattern (OOP) I may only have access to the one pattern finding it again may not be feasible or buying another one might be too expensive. Being able to save the pattern so that I can actually make all the views I want will definitely save me money.

-What if I run across an older pattern where all the pieces layered on top of each other, this would mean that I would have to trace out the pattern to be able to use it.

-Maybe I'm a collector who has OCD about their patterns and want to keep them always in an uncut, usable condition.

Whatever the reason knowing how to go about tracing a pattern is a skill that is worth looking into.


Monday, September 8, 2014

McCall's M7000, View A, Yoke, Sleeves, and Lining

 I have finished the dress portion.
For the yoke, I did french seams for the shoulders.


Then I attatched it to the bodice.
Next I sewed the lining together.
Then attached the lining to the top of the bodice, under stitched the lining, and slip-stitched the sides and bottom of the lining.


Next I stitched the sides of the facing and turned it right side out.


Then stitched it to the collar matching raw edges and under stitching the seam. Which I do not have pictured.

Next came the sleeves. I stitched the sleeve seam with a french seam.


And hemmed the cuffs.


And attached them to the bodice and yoke with a french seam.
The french seam


The attached seam


Finally I hemmed the bottom of the skirt with a rolled hem.


I finished the dress part of the Anna dress, I'm still debateing on the appliques. I'll probably do them at a later time.
Happy Sewing
Kelly

Wednesday, September 3, 2014

McCall's M7000, View A, Bodice, Skirt, and Zipper

I started  by piecing the bodice together, the front first.

 Then the back.

 Then sew the front to the back at the side seams.

Next sew the skirt back pieces together back-stitching at large dot.
Then sewing the front to the back at the side seams.
 I decided to sew a french seam in the sides of the skirt.

Next, sew the bodice to the skirt.


And, finally, add the zipper.
Closed view


Open View


Inside View


I sewed the zipper on using my method this time instead of the method in the instructions.
Next is the yoke, sleeves, and lining.
Happy Sewing